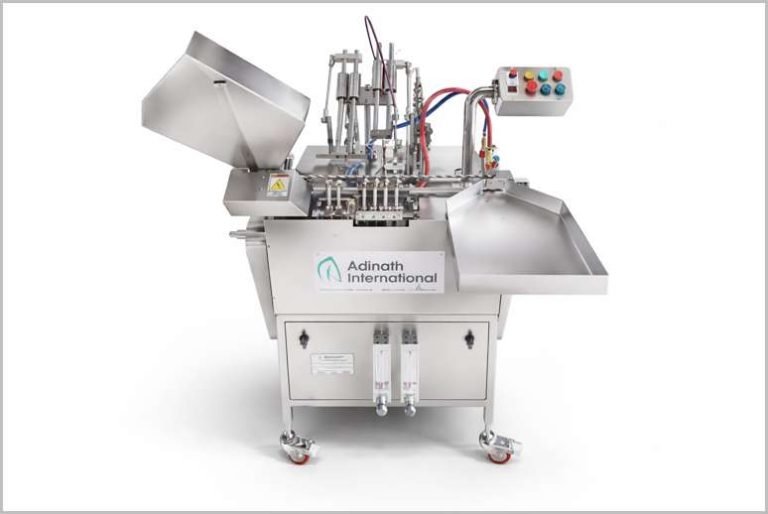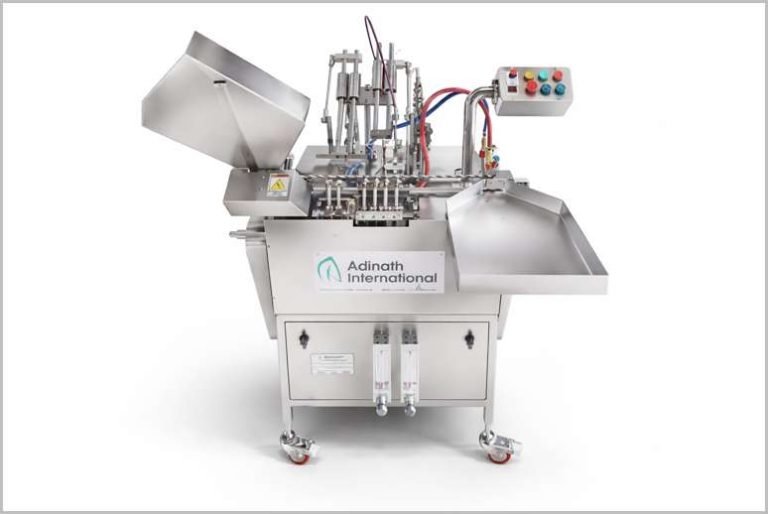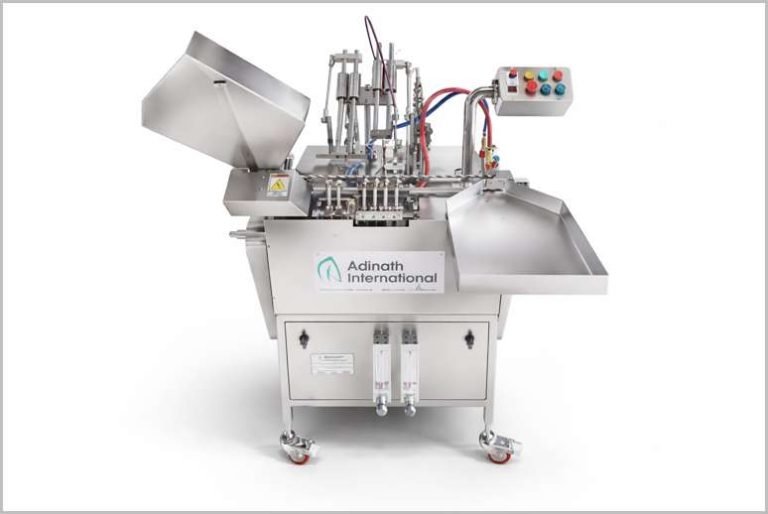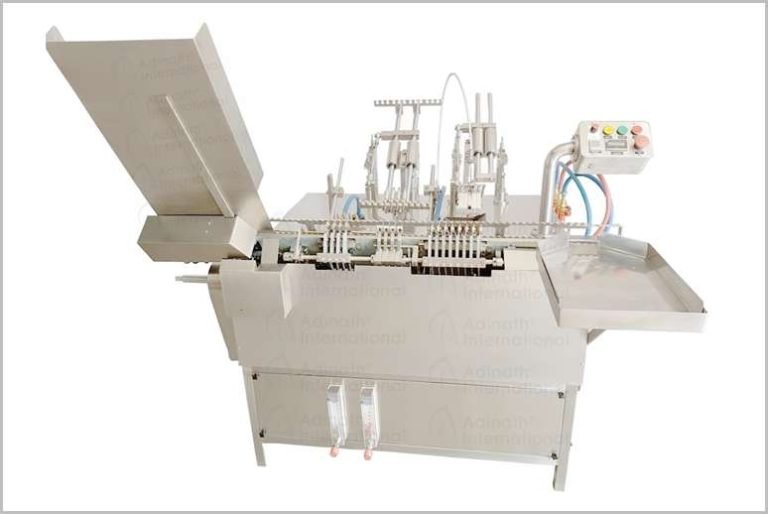
Ampoules are small, hermetically sealed glass containers used for single-dose injectable liquids. Unlike a vial, an ampoule has no rubber stopper or cap: once it has been filled, it is closed by melting its own glass neck. An ampoule filling machine therefore does two critical jobs in one continuous cycle. It measures and dispenses an exact volume of liquid into each ampoule, and it seals the ampoule with a controlled flame before the product can be exposed to the surrounding air for longer than necessary.
This guide explains the ampoule filling machine working principle step by step, from the moment a clean ampoule enters the machine to the moment a sealed ampoule leaves it. It is written for production engineers, maintenance teams and buyers who want to understand what happens at each station and which factors decide fill accuracy and seal quality. If you are comparing models, you can also browse the ampoule filling machines we manufacture.
What an ampoule filling machine does
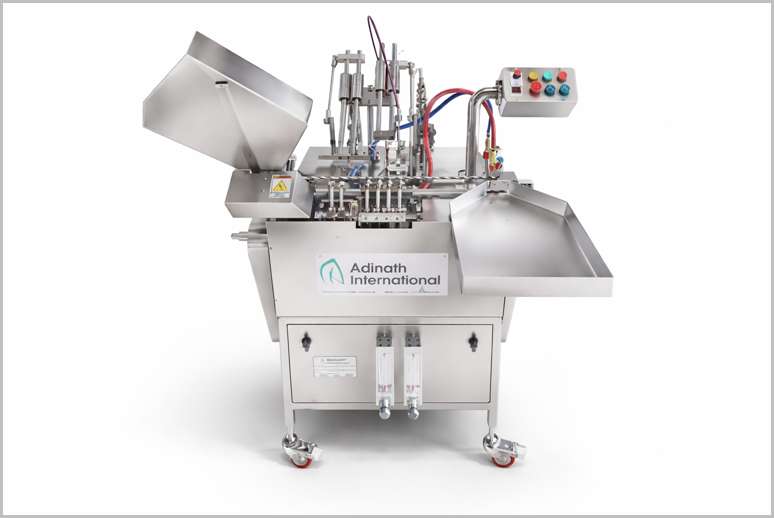
An ampoule filling and sealing machine receives washed and sterilised empty ampoules, fills them with a liquid product through stainless steel needles, optionally flushes them with an inert gas, and seals them by heating and closing the glass neck. The same basic principle is used whether the machine has a single filling head for laboratory work or several heads for commercial production.
The main differences between models are the number of filling heads, the ampoule size range the machine is designed for, the way ampoules are transported between stations and the level of automation. A typical ampoule filling machine is built around a fixed sequence of stations, and every ampoule passes through each of them in the same order. Machines are normally set up for a defined range of ampoule sizes, with size-specific change parts for the transport and guide components.
Throughout this article, the term “head” means one complete filling position: one dosing syringe with its valves and one filling needle. A two-head machine fills two ampoules in each cycle, a four-head machine fills four, and so on.
The ampoule filling cycle at a glance
Before looking at each stage in detail, it helps to see the complete sequence. The order below is typical, although some stations are optional and their exact arrangement varies from one design to another.
| Stage | What happens | Why it matters |
|---|---|---|
| Infeed and transport | Empty ampoules are fed from a hopper or tray and moved forward in groups | Correct positioning under the needles and burners |
| Pre-gassing | Inert gas is blown into the empty ampoule | Reduces oxygen for oxygen-sensitive products |
| Filling | A syringe pushes a set volume through a needle into each ampoule | Determines dose accuracy |
| Post-gassing | Gas flushes the headspace above the liquid | Limits oxygen trapped before sealing |
| Pre-heating and sealing | The rotating neck is heated and closed | Determines seal integrity and appearance |
| Outfeed | Sealed ampoules leave the machine | Hand-over to inspection and packing |
Stage 1: Ampoule infeed and transport
Ampoules arrive at the filling machine already washed and sterilised. In a complete line they come directly from an ampoule washing machine and a sterilising or depyrogenation stage; on smaller set-ups they are loaded into the infeed hopper or tray from trays. Clean glass is essential, because particles or residues inside the ampoule cannot be removed once it is sealed. If you are planning the upstream part of the line, you can see our ampoule washing machines.
From the infeed, ampoules drop into grooved transport parts that hold them upright and at a fixed pitch. Depending on the design, the transport is a reciprocating mechanism that lifts and steps the ampoules forward, a rotating wheel, or a conveyor with guides. In each case the transport moves a group of ampoules, equal to the number of filling heads, from one station to the next and holds them still while each operation takes place.
Because the transport parts touch the ampoule body, they are sized for each ampoule format. Changing from one ampoule size to another normally means fitting a different set of change parts and re-adjusting the needle and burner heights.
Stage 2: Pre-gassing with an inert gas
Many injectable formulations are sensitive to oxygen. For these products, an inert gas, most commonly nitrogen, is blown into the empty ampoule through a dedicated needle or nozzle before filling. The gas displaces most of the air inside the ampoule, so the liquid is filled into a low-oxygen atmosphere.
The gas supply is usually filtered before it reaches the nozzles, and the flow is set so that it purges the ampoule without disturbing it. Pre-gassing is not needed for every product; whether to use it, and at what flow, is a decision for the product and process owner rather than the machine itself.
Stage 3: Filling — how the dose is measured
The filling station is the heart of the ampoule filling machine working principle. It has to deliver the same volume into every ampoule, cycle after cycle, without wetting the ampoule neck.
Syringe (piston) dosing
Most ampoule fillers use volumetric syringe dosing. Each filling head has a syringe, made of glass or stainless steel, with a plunger driven by the machine. On the suction stroke, the plunger draws liquid from the product supply through an inlet valve. On the delivery stroke, it pushes the same volume out through an outlet valve and along a tube to the filling needle. Non-return valves make sure the liquid only flows in one direction.
The fill volume is set by the length of the plunger stroke. A longer stroke delivers more liquid, a shorter stroke delivers less. Machines usually provide a main adjustment for all heads together and a fine adjustment so that each head can be balanced against the others. After adjustment, fill volumes are checked by weighing filled samples.
Needle movement and neck protection
During filling, the needles move down into the ampoule neck so that the liquid is delivered inside the ampoule rather than across its opening. When dosing is complete, the needles withdraw. Keeping the neck dry is important: liquid left on the neck can char or form bubbles when the flame is applied, which leads to weak or discoloured seals.
The timing between the needle movement and the syringe stroke is fixed mechanically or electronically, so the liquid only flows while the needle is inside the ampoule. Drops forming on the needle tip after filling are a common cause of neck wetting and are usually controlled through valve condition, needle choice and the end of the delivery stroke.
No-ampoule, no-fill
On many automatic machines, a sensing arrangement stops dosing at any position where no ampoule is present. This prevents liquid being sprayed onto the machine and wasted, and keeps the filling area clean.
Stage 4: Post-gassing
After filling, a second gas flush can be applied to the headspace above the liquid, just before the ampoule moves to the sealing station. This removes the air that entered while the ampoule was open and reduces the oxygen that will be trapped when the ampoule is sealed. Like pre-gassing, post-gassing is a product-dependent option.
Stage 5: Sealing — how the ampoule is closed
Sealing turns an open glass tube into a closed, tamper-evident container. It is done with burners that produce a hot, concentrated flame from a fuel gas mixed with oxygen. The flame is adjusted for each ampoule size and glass type.
While the neck is in the flame, the ampoule is rotated, usually on rollers, so that the glass is heated evenly all the way round. Most machines first pass the ampoule through a pre-heating zone, where the neck is warmed gradually, and then through the sealing zone, where the glass becomes soft enough to close.
Pull sealing
In pull sealing, the softened tip of the neck is gripped by a pair of jaws and drawn away from the ampoule. As the glass stretches, it narrows and fuses, leaving a closed, rounded end on the ampoule while the excess glass is removed. Pull sealing generally produces a consistent, well-formed seal and is widely used in production machines.
Tip sealing
In tip (fusion) sealing, the open tip is melted until the glass flows together and closes without being pulled. It is a simpler action, but the seal quality depends heavily on flame setting and timing; if the glass is not heated correctly, the result can be a thin tip or a small hole. Our Ampoule Filling and Sealing Machine range shows how filling and sealing are combined in one machine.
Stage 6: Outfeed and what happens next
Sealed ampoules leave the machine onto an outfeed tray or conveyor. They are still warm at the sealed tip, so the outfeed is designed to collect them without knocking them together. From here, ampoules are normally checked for seal integrity and visible particles, and then labelled and packed. In a complete line, these steps are carried out by dedicated inspection and labelling machines.
How the stations stay synchronised
All stations work in a fixed rhythm. A main drive turns cams or controls servo motors that move the transport, lower and raise the needles, drive the syringe plungers, operate the gas valves and move the sealing jaws. Because every movement is linked to the same cycle, the machine fills and seals each group of ampoules in exactly the same way.
Output depends mainly on the number of filling heads, the ampoule size and fill volume, and the time needed for sealing. Larger ampoules and larger fill volumes need longer filling strokes and more heat, which lowers the number of cycles per minute. For higher outputs, manufacturers add filling heads rather than simply running faster. Automatic ampoule filling machine models integrate infeed, filling, gassing and sealing into one continuous sequence, while a model such as our Four Head Ampoule Filling Machine fills four ampoules in every cycle.
Factors that affect fill accuracy and seal quality
Understanding the working principle makes it easier to see where problems come from. Most variations in fill volume or seal quality can be traced to one of the factors below.
| Factor | Possible effect | What to check |
|---|---|---|
| Syringe and valve condition | Fill volume drifts or varies between heads | Wear, leakage and cleanliness of syringes and valves |
| Air in the product line | Low or inconsistent fills | Priming, tube connections, product level in the supply |
| Liquid properties | Volume changes with viscosity or temperature | Stable product temperature; re-check weights after changes |
| Needle position and drips | Wet neck, charred or bubbled seals | Needle height, alignment, drip at end of stroke |
| Flame setting | Thin, open, distorted or burnt seals | Gas and oxygen ratio, burner condition, burner height |
| Ampoule quality | Breakage or uneven sealing | Dimensional consistency and cleanliness of the glass |
| Rotation during sealing | Uneven heating of the neck | Roller condition and contact with the ampoule |
For the parameters of a specific machine, always follow the manufacturer’s manual and your own validated process settings. The table above is a guide to where to look, not a replacement for site procedures.
Where ampoule filling machines are used
Ampoule filling machines are used wherever a liquid has to be packed in a sealed glass ampoule. The main application is injectable liquids for human and veterinary use, but the same principle is also used for other liquids that need a hermetic glass container, such as some laboratory reagents and biological indicator ampoules. Laboratory and pilot-scale machines follow the same sequence on a smaller scale and are often used for product development and small batches.
The filling machine in the complete ampoule line
An ampoule filling machine rarely works alone. A typical injectable ampoule line runs from washing, through sterilising, to filling and sealing, and then to inspection and labelling. Each machine has to match the output of the others, so the filling machine is usually chosen together with the rest of the line. You can browse all pharmaceutical filling lines to see how these machines are combined.
Conclusion
The ampoule filling machine working principle comes down to a precise, repeatable sequence: position a clean ampoule, purge it if needed, dose an exact volume through a needle without wetting the neck, flush the headspace if needed, and close the glass neck with a controlled flame while the ampoule rotates. Fill accuracy depends mainly on the dosing syringes, valves and product supply. Seal quality depends on a dry neck, the right flame and even rotation.
If you are planning a new ampoule line or upgrading an existing machine, our team can help you match the number of heads, ampoule range and sealing method to your product. Send an enquiry about an ampoule filling machine and tell us your ampoule sizes, fill volumes and required output.